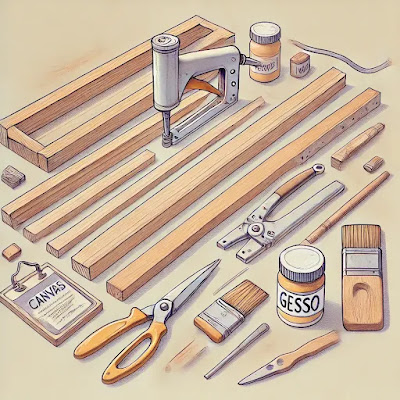
How to Handcraft Your Own Canvas for Painting
Have you ever wanted to create a truly personalized painting surface? Crafting your own canvas is easier than you think and incredibly rewarding. Today, I attended a fantastic training session led by Mr. Evan Woodruffe, the product specialist at Gordon Harris. As an artist with vast expertise, Evan shared essential tips on stretching a canvas from start to finish. This guide combines my knowledge and step-by-step instructions to help you craft a professional-quality canvas.
Section 1: Preparing Your Materials
 |
|
To begin, gather these materials:
Stretcher Bars: Wooden pieces to form the frame, available in various sizes.
Canvas Fabric: Choose cotton or linen, depending on your painting medium.
Staple Gun: A medium-duty tool for attaching the fabric securely.
Scissors: Use to cut the fabric and trim excess.
Gesso: For priming the stretched canvas.
Paintbrush or Roller: To apply gesso evenly.
Tip: Investing in quality tools will ensure durability and a professional finish.
Section 2: Assembling and Stretching the Canvas
Visual: Step-by-step drawings or photos of assembling and stretching the canvas.
Subheading: Step-by-Step Instructions
Prepare the Frame: Assemble the stretcher bars into a rectangular or square frame. Use a rubber mallet to secure tight joints. For larger canvases, add pine braces for stability.
Cut the Canvas: Lay the fabric flat and place the frame on top. Leave 3-4 inches of extra fabric on all sides before cutting.
Attach the Canvas: Center the fabric over the frame. Start stapling from the middle of one side and work outward, keeping the fabric taut.
Fold the Corners: Trim excess fabric and fold corners neatly, stapling securely.
Tip: Use canvas pliers to ensure even tension while stapling.
Section 3: Priming Your Canvas
Visual: Show a photo of applying gesso with a brush.
Subheading: Prepare the Surface for Painting
Priming your canvas with gesso seals the fibers and creates a smooth, paint-ready surface. Follow these steps:
Lay the stretched canvas flat.
Apply a thin, even coat of gesso using a wide brush or roller.
Allow it to dry completely, then add a second coat if needed.
For an ultra-smooth finish, sand lightly between coats.
Tip: Multiple coats of gesso are ideal for oil painting, while one coat may suffice for acrylics.
Conclusion:
Congratulations! You've handcrafted your own canvas, ready to bring your artistic vision to life. Making your own canvas is not only cost-effective but also allows you to customize the size and texture to fit your unique needs. This process, as demonstrated by Evan Woodruffe, is straightforward and highly rewarding.


Comments
Post a Comment